This is a how-to for the 2019-2022 (Gen 2) Hyundai Veloster N DCT change. This can be a challenging job if you don’t have the right tools, due to the placement of the fill plug. The drain plug is like any other, but the fill plug is located behind and above the axle on the driver’s side, blocked by an upright that is connected to the subframe – meaning no easy way around this one.
Unless you already have an angled 17mm ratcheting wrench – stop right here and order one. The auto parts store doesn’t have one as long as what you’ll need. Both of these (1 and 2) worked for getting on the bolt, angling, and twisting.
The other important note is that this transmission will be full LONG before it starts dribbling out of the fill plug – common for most transmission drain & fills. While the recommended method is to drain out and refill exactly what you replace, after speaking with a few shops, a drain & fill of 3qts is about perfect for the car. The full capacity is 3.5L, with about 0.5L that stays in the trans unless you have a Hyundai dealer run the code to flush out the rest. I had initially put in 3.5, then then 4qts after expecting and not seeing the fill dribble out the fill. Turns out, with that amount of fluid in the trans, the excess will be pushed out the breather – onto your windshield, until it reaches its level.
Otherwise, the process is a standard drain & fill. Shifting has proven to be a little smoother after the flush, particularly on downshifts. Happy with the result. I’ve done it right around 15k miles, so every 15k is the plan moving forward.
Items/Tools Required:
- 3 quarts of DCT fluid. I chose Motul DCTF
- 17mm angled ratcheting wrench (here)
- 24mm socket
- Drain pan
- Fluid Pump (I used this)
- Flathead/panel poppers & 10mm long socket
I’ll include some pictures below but the process is basically:
- Raise the car/use ramps. Raising the car evenly is advisable for this over ramps, but I was lazy.
- The undertray needs to come off to access the trans. I didn’t take pictures of this, but it’s just a bunch of clips and 6-8 10mm screws. I just kept removing until the whole thing came off.
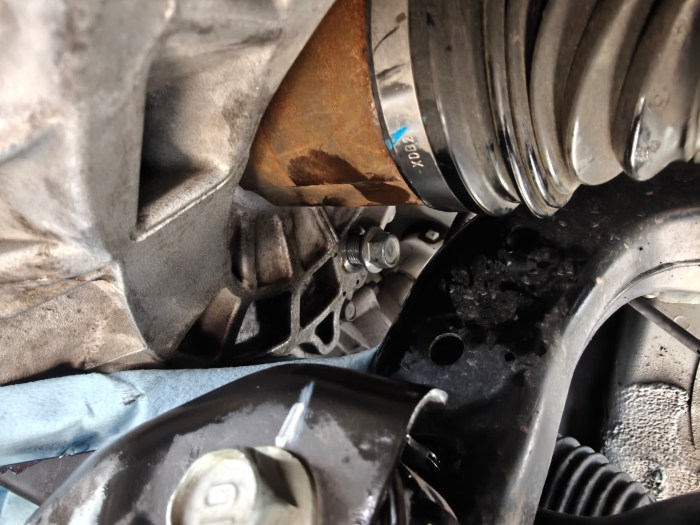
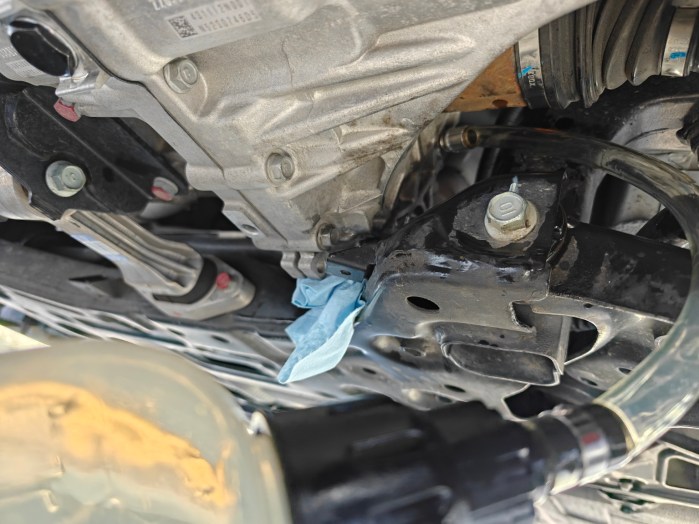
- Once under the car, make sure you can access/break loose the 17mm fill plug first. I had to get a new tool in order to accomplish this. It’s in a very tight spot, behind and above the axle on the driver’s side, with some kind of metal upright connected to the subframe blocking access further.
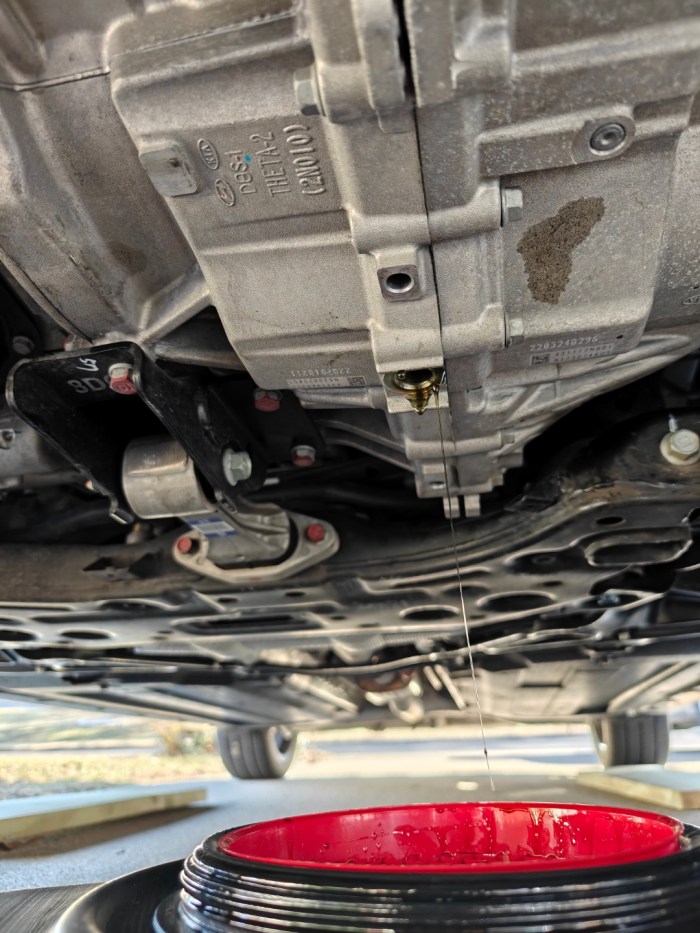
- Once the fill plug is broken loose, you can loosen the 24mm at the bottom to drain all the fluid, and then replace the bolt with a new crush washer.
- You’re supposed to measure how much you took out, wait to reach the same temperature as the fluid going in, and then add in – I didn’t bother with this, I just put in ~3 qts.
- I used a pump to snake a hose through and into the trans and filled. It is not designed to dribble out when full – it stops much earlier than that, which is why it’s important to just fill 3 qts.
- Once done, you can replace the drain plug. I struggled to do this, but it’s possible, turning the bolt with just the edges of my fingers until it caught.
- Start the car, and put it through P > R > N > D a few times before driving it.