This is a how-to for the 2019-2022 (Gen 2) Hyundai Veloster N rear sway bar swap. A little tricky, but not too bad overall. Took me probably 2 hours or so. The key for me was to leave the endlink on the sway bar and detach it from the car instead, which makes the job a bit easier. There’s not a lot of room there otherwise, it’s a little too close to the spring to get any leverage on.
Items/Tools Required:
- Jack & Stands
- 19mm (lug nuts), 12mm (endlink attachment), 14mm (sway bar bracket bolts)
- 17mm open ended wrench (or ratcheting wrench, endlink), 6mm hex key (endlink)
- Rear Sway Bar (I chose the Whiteline 24mm RSB)
1. Car Up, wheels off. 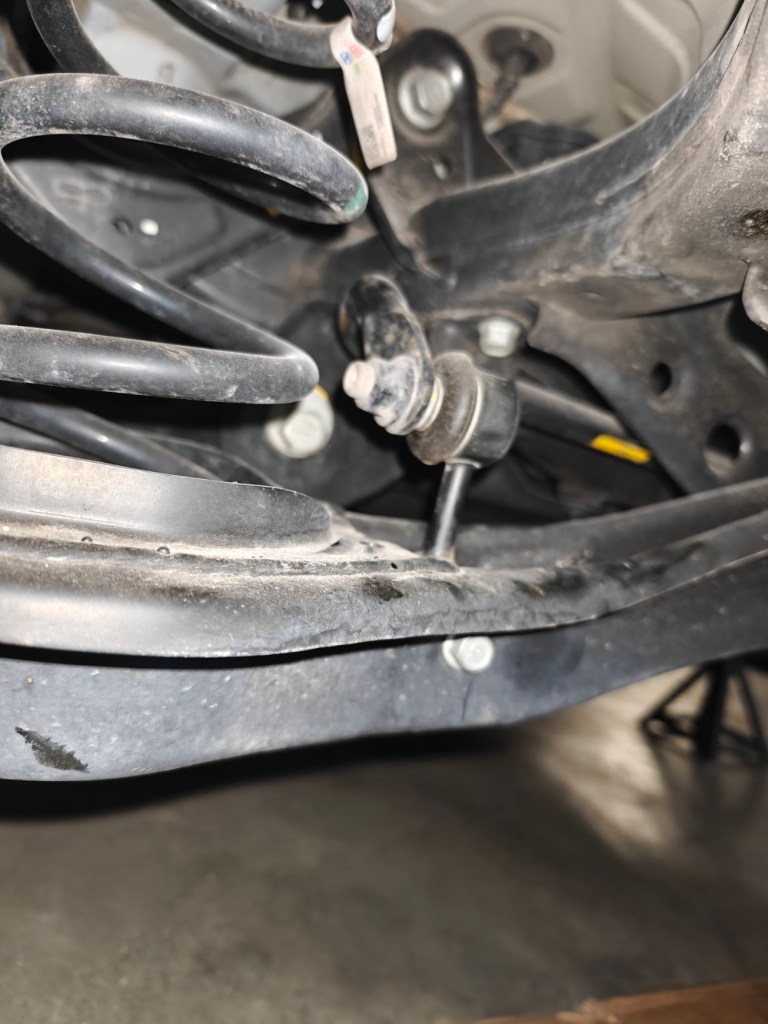
2. When you get under the car, you’ll see the sway bar is connected to the chassis by 14mm bolts via 2 brackets, and to the endlink, which is connected to the control arm. 
3. I loosened the 14mm bolts at the top, and then completely removed the 12mm bolts at the bottom to release the endlink from the control arm. 
4. Remove the 14mm bolts holding the sway bar bracket. Once they are removed, it is fully disconnected from the car. 
5. I was worried for a minute thinking I’d have to remove the exhaust, but I was able to work the sway bar out by tucking in the endlinks and shuffling it out towards the driver side. It clears! 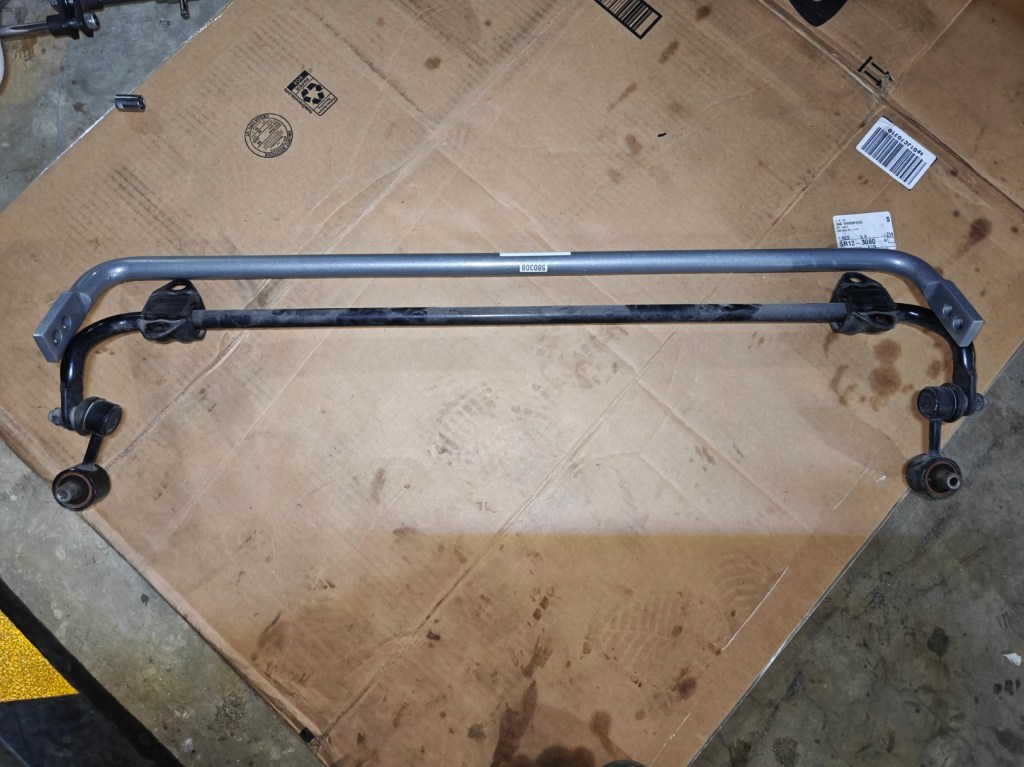
6. Now, time to transfer the endlinks from the stock bar (19mm) to the new Whiteline bar (24mm). The WL is noticeably thicker, and also has a slightly different shape. The stock bar has a turn down in the arm, while the WL continue straight on. Wasn’t an issue. 
7. I tried using my 17mm and the 6mm hex, but I couldn’t get enough torque on it. Thankfully, The impact wrench is great for this kind of stuff. Zapped them loose real quick, then used the wrench and hex to remove them. To install, I used the impact again to zap them onto the bar, and then used the hex and 17mm to tighten them down. 
8. With the endlinks attached to the bar, you can work it back the same route that you took to remove it. I thought it would be difficult to attach the endlinks back through, but it’s actually a snug fit and once it lines up the bolt will slide straight through. I intentionally reinstalled the endlinks first, then the sway bar brackets. 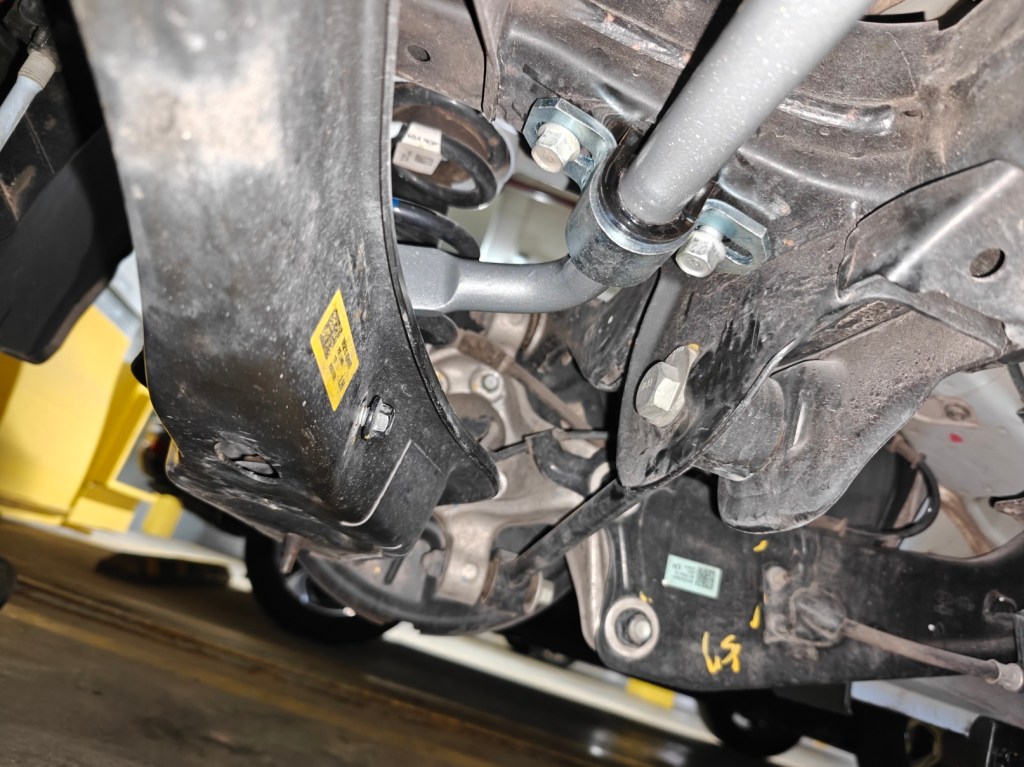
9. Install the 14mm bolts through the brackets. I had to shift my brackets as rearward as possible before tightening them down – it was tweaked a little far forward, and the bracket is kind of long so it was at risk of hitting the wall of the subframe there. That’s it! Make sure everything is tightened down back to where it was.
This is way more like it! Before, the car felt like it could turn, but kinda didn’t want to. Now the car turns when I want it to turn. The front end feels way more responsive and it’s really transformed the car. This is the sharpness I was expecting to feel from the factory. It really makes up for the longer wheelbase. I’ve seen some reviews note that this car doesn’t rotate as much as they’d like and that understeer particularly shows up in tight stuff (autox). Whiteline also had a 22mm option, but I knew for my purposes I’d have to get the stiffest option possible. Apparently the soft setting on their 24mm bar is stiffer than the stiff setting on the 22mm, so this is where I plan to start. I’m really, really happy with the change already and the improvement in the feel of the car, so I’m looking forward to getting this thing to an autox now.


